

Hi all! Today I'm going to be talking about makeup brushes - how to use them, which products they work best with, and how much they cost. This certainly won't cover every kind of makeup brush ever made, not even close, but I'm going over the majority of my personal collection. I have more brushes than I'll ever need, but what's a girl to do?
I recently washed my brushes, and I figured this was as good a time as any to photograph them. I'd also like to thank my cousin Grace for the idea to do this post. This is going to be a long one so feel free to skip ahead to the section your interested in.
Let's get started with foundation brushes.

These are the four brushes that I go back and forth between to apply my foundation. I like having more than one because these get dirtiest the fastest. I use these brushes with liquid and cream foundations, so they also collect a lot of bacteria if they're not cleaned regularly. Another reason I like to have a few different types of foundation brushes is because they all provide varying amounts of coverage.
1. Real Techniques - Expert Face Brush - $9
 \
\2. Real Techniques - Stippling Brush - $10

3. Real Techniques - Multi Task Brush - $18

This brush alone does not cost $18, but it is only sold in the Travel Essentials kit that comes with two other brushes. This brush provides the lightest coverage, and it is the only one that I blend in my foundation using circular motions. I use this when I'm having a good skin day or don't want a completely full coverage finish. It is actually meant to be used with powder products, but I prefer it with liquid foundations.
4. Sigma - F80 Flat Kabuki - $24

If you've ever heard of Sigma Beauty, then you'll know all about this holy grail foundation brush. It is more expensive than my other foundation brushes, but it's still half the price of most MAC brushes, and this one is absolutely worth it. The synthetic bristles combined with the flat head create the perfect medium-full coverage finish when patting the foundation into the skin. This brush doesn't pick up too much product and therefore wastes very little product. If you're willing to spend the money on an amazing liquid/cream foundation brush, I would highly recommend this one.
You can also apply foundation/concealer with makeup sponges.

These are basically cheaper versions of the infamous Beauty Blender that is sold at Sephora. The sponges as shown above are dry, but they are only to be used when wet. This is important because if you try to use them dry, it will be a mess. Basically, you just squeeze them under some water about ten times and then ring them out so there's no excess water left. They will expand to about twice their size, and then you just dab the liquid/cream foundation or concealer into your skin.
1. Precision - Blending Sponge - $10
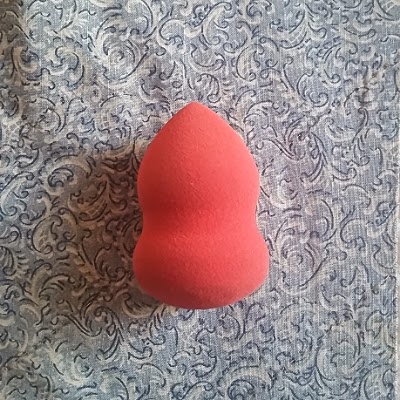
2. Real Techniques - Miracle Complexion Sponge - $6

For only $6, I really can't complain that this sponge is a a little more flimsy than the first one. The flat edge of this sponge is great for the contours around the eyes and nose, but I usually use the pointed end for concealer and the rounded part for foundation. I found this at my local Kohl's, but they also sell Real Techniques at Ulta.
Now, onto concealer brushes.

These are both from Sigma Beauty, but I reach for them every time I do my under-eye concealer, and I can't do my makeup without them.
1. Sigma - F86 Tapered Kabuki - $24

This brush was not originally labeled as an under-eye concealer brush, but so many people were using it as one that the website actually changed the Function section of its description on the Sigma website. Because of the way this brush is tapered, it can really get into the corners around your eyes to perfectly blend out liquid/cream concealers without picking up too much product.
2. Sigma - F35 Tapered Highlighter - $24

This brush isn't technically meant for under the eyes either, but it works wonders at setting the concealer under your eyes with a powder (I use the MAC Pro Shaping Powder in the shade Emphasize). Again, because this brush is tapered, it's perfect for reaching into the inner and outer corner of the eyes, as well as reaching right under the lower lash line. It is also a good brush for highlighting the top of the cheekbones.
Next, we have powder foundation brushes.

I enjoy both of these brushes, but they're by no means the best powder brushes in the world. Most powder brushes seem the same to me, but I was just able to find these at Target, and they do the job, so that's why I like them.
1. Sonia Kashuk - Synthetic Flat Top Multipurpose Brush No. 04 - $15.79

This brush is actually somewhat similar to the Sigma Flat Kabuki brush, and I used to use this one for liquid foundation before I bought the Sigma one. Then, I found a better use. I really love this brush for pressed powders, especially if I have blemishes that need extra coverage, or I want to apply more powder to my T-zone so that I don't get oily throughout the day. After liquid foundation, I will pat this into a pressed powder and then dab it onto my face wherever I want more coverage.
2. Sonia Kashuk - Large Powder Brush No. 01 - $19.19

This is just your average large, fluffy, powder brush. I use this with loose, translucent powders to set my entire face after I have applied liquid foundation and concealer. I just tap it in the powder, shake off the excess, and then brush it all over my face for a matte finish.
Bronzer and Contour brushes!

This is pretty self-explanatory. These brushes are used to sculpt out your cheekbones, warm up your skin, and add color to your face.
1. e.l.f. - Studio Complexion Brush - $3.00

Okay, e.l.f. prices seriously cannot be beat. This is just a regular powder brush, but it's denser and more flat than the Sonia Kashuk one, which makes it great for applying a light wash of bronzer on days when you don't feel like sculpting out your face with a sharp contour. I use this to sweep powder bronzers on my cheeks, the sides of my forehead, and under my chin. I picked mine up from Target.
2. Benefit Cosmetics - Hoola Brush - $28

This is actually a pretty good deal. Although this brush isn't sold individually, it comes with the Hoola bronzer from Benefit. It's a great dupe for the NARS Ita Brush, and you get a great contour shade with it. I use this brush with Hoola to carve out a line under my cheekbones and really define them. Most of the Benefit blushes come with this brush as well, and you can find them all at Sephora or Ulta.
Onto the blush brushes.

This is kind of a personal preference thing. Everyone likes different types of brushes for different uses, but these are the two blush brushes that I like to use, one for a lighter pop of color, the other for a more intense application.
1. Sonia Kashuk - Blusher Brush No. 02 - $17.19

This is basically a smaller version of the Large Powder Brush, and it's great for blending out powder blushes onto your cheeks for a natural-looking flush. Because this brush is so fluffy, it doesn't pick up a lot of product, which is nice if you tend to be heavy-handed with your blush. Application is pretty simple - dip it into a blush, then blend it across your cheeks, usually right above the contour if you've applied one.
2. Essence of Beauty - Blush Brush - $0.99

This is my favorite style for blush brushes, but for the life of me, I can't remember where I bought it. I spent some time digging around online and finally found it on eBay, so that's where you'll be directed if you click the link above. I'm sure they sell brushes like this at Target, and I know they have one on Sigma's website. This brush is great for a precise, concentrated application of powder blush. It's not too dense, and it's still easy to blend out while applying a bright wash of color to your cheeks. Dip brush in blush, sweep brush over cheeks. Done.
My personal favorites - highlighting brushes.

Everyone loves that glowing-from-within look that can be achieved by applying a highlighter to the top of your cheeks, the bridge of your nose, and right above your cupid's bow. These two brushes fulfill all of my luminizing needs.
1. Sigma - E50 Large Fluff - $16

This is a wide, flat, soft brush used for controlled highlighting. You can use it for an intense, precise highlight on top of your cheekbones, but I prefer to use it to highlight my brow bone and my cupid's bow. It's also good at applying shadow to the eyelid if you're want a more subtle look.

The classic fan brush. These are sold in a lot of different stores, but this one can only be found at Ulta, either in-store or online. It's perfect for highlighting the top of the cheekbones and bridge of the nose to really give your face that dewy, glowy look you always see on the red carpet. It's super soft and it doesn't remove any makeup underneath the highlighter. My favorite product to use it with is the Bobbi Brown Shimmer Brick in Beige.
Last but not least, we have eye brushes.

Yes, there are a lot of them, but they all do different things! Eye shadow is my favorite part of makeup, so that might be another reason why I have more of them than anything else.
1. Sigma - E40 Tapered Blending - $16

This was the first eye shadow brush I bought that was not from the drugstore. It's perfect for applying the transition shade in the crease of your eye, usually a light brown color blended from outer corner to inner corner just above the lid. It's soft, fluffy, and essential for a well-blended eye look.
2. Sigma - E30 Pencil brush - $14

This tiny, dense, tapered brush is perfect for blending out eye liner, blending out shadow underneath the lower lash line, and defining the crease. I mostly use it for blending out gel liners on the lash line for a smokier look. I'll sometimes use this brush to contour my nose as well.
3. Sigma - E25 Blending brush - $14

This brush is perfect for smoking out shadows in the crease and really blending out harsh lines. It's in between the sizes of the first two brushes, and it can also be used to apply a light wash of color to the lids, but this is my favorite brush for the crease by far.
4. Real Techniques - Domed Shadow Brush - $18

This brush only comes in the Real Techniques Travel Essentials kit that I mentioned before, so you do get 3 brushes for $18. I love this brush if I'm in a hurry and I only want to apply one eye shadow. I'll usually go for a shimmery shade, and use this brush to cover the entire eyelid and then buff it up into the crease a little bit. This is my most versatile shadow brush by far.

I wouldn't necessarily call this brush "fluffy," but it is great for highlighting underneath the brow and in the inner corners for a more awake look. I will also use it with a flesh-colored eye shadow to clean up my brows with this brush if I overdrew them by accident.
6. e.l.f. - Smudge Brush - $4.49

I think this brush must have been discontinued because once again, I had to find the link on eBay. I've had it long enough that it's started to feel a little rough on my eye area, but it's still great at applying shadow underneath my lower lash line. Because it's so small and dense, it reaches right up to the root of my bottom lashes and applies the perfect amount of shadow without making it look as if I have a black eye like some bigger brushes might do.

Yes, I know this is a concealer brush. No, I don't use it for concealer. This is the perfect brush for applying intense color to the lid. It does a great job dry, but if you wet it with eye drops before dipping it into your shadow, the color really pops. I also use this brush with eye drops if I'm applying loose pigments to my lids, and it also helps prevent fallout.
8. Anastasia Beverly Hills - Brush #12 - $18


This double-ended brush is meant to be used on the brows, and I use the spooley part to comb through my brow hairs, but I use the brush end to apply gel liner to my upper lash line. The high quality synthetic bristles create the perfect wing, and I just find it much easier to work with than the felt tip that comes with most liquid eyeliners.
And, that's a wrap! Jeez, you don't realize how many brushes you have until you sit down to type a paragraph about each one. I hope I didn't bore you all too much and that you found the information useful. If you haven't seen my post about my new logo, I posted that earlier today so go check it out!
Feel free to leave comments if you have any other questions. I'll be posting again sometime later this week.
Make sure to check out my Instagram (@_magpiebeauty) to find out when I put out a new blog post immediately.
Hope you're all having a relaxing Sunday, and thanks for reading!
Love,
Maggie
Very informative! Thanks for the education :)
ReplyDelete